Docker Build Cache & Layering
Have you ever wondered why the first build takes 5–10 minutes, but the second build finishes in just a few seconds? That’s thanks to Build Cache. But sometimes, changing just one line of code causes Docker to rebuild everything — that’s because you don’t yet understand how Layering works. 🧱
In this article, I’ll explain in detail how Layers and Build Cache work, how Docker decides when to use cache versus rebuild, and techniques to optimize for faster builds.
What Is a Layer in Docker?
Each instruction in a Dockerfile creates a layer in the image. You can think of an image as a stack of layers piled on top of each other, with each layer adding new content on top of the previous one.
How Layers Are Created
| |
| Layer | Dockerfile Instruction | Content |
|---|---|---|
| Layer 1 | FROM node:18-alpine | Base OS + Node.js runtime |
| Layer 2 | WORKDIR /app | Create and switch to /app directory |
| Layer 3 | COPY package.json ./ | Add package.json file |
| Layer 4 | RUN npm install | Install node_modules |
| Layer 5 | COPY . . | Add all source code |
| Layer 6 | RUN npm run build | Generate build files (dist/) |
Key Characteristics of Layers
- Read-only: Each layer is immutable once created — it cannot be modified
- Shareable: Multiple images can share identical layers (e.g., the same
node:18-alpinebase image) - Ordered: Each layer stacks on top of the previous one, forming a complete file system
- Sized: Each layer has its own size — the sum of all layers equals the image size
How Does Build Cache Work?
Build Cache is the mechanism that allows Docker to skip unnecessary steps when rebuilding an image. If a layer hasn’t changed since the last build, Docker reuses the previous result instead of running it again.
Docker’s Cache Rules
Docker checks cache in order for each instruction in the Dockerfile:
| |
The most important rule: When a layer is invalidated (cache miss), all subsequent layers must also be rebuilt — even if they haven’t changed at all.
When Is Cache Invalidated?
| Scenario | Cache invalidated? | Explanation |
|---|---|---|
| Dockerfile instruction changed | ✅ Yes | Docker compares instruction strings — different → rebuild |
Files in COPY/ADD changed | ✅ Yes | Docker computes file checksums — different → rebuild |
Only file mtime changed | ❌ No | Docker ignores modification time, only checks content |
RUN instruction identical to last | ❌ No | Same instruction string → use cache (even if outdated) |
| Previous layer was invalidated | ✅ Yes | All subsequent layers must rebuild |
Cache Invalidation Example
| |
You only edited one small .js file, but npm install has to run again even though package.json hasn’t changed. This is the most common issue with unoptimized Dockerfiles.
Techniques to Optimize Build Cache
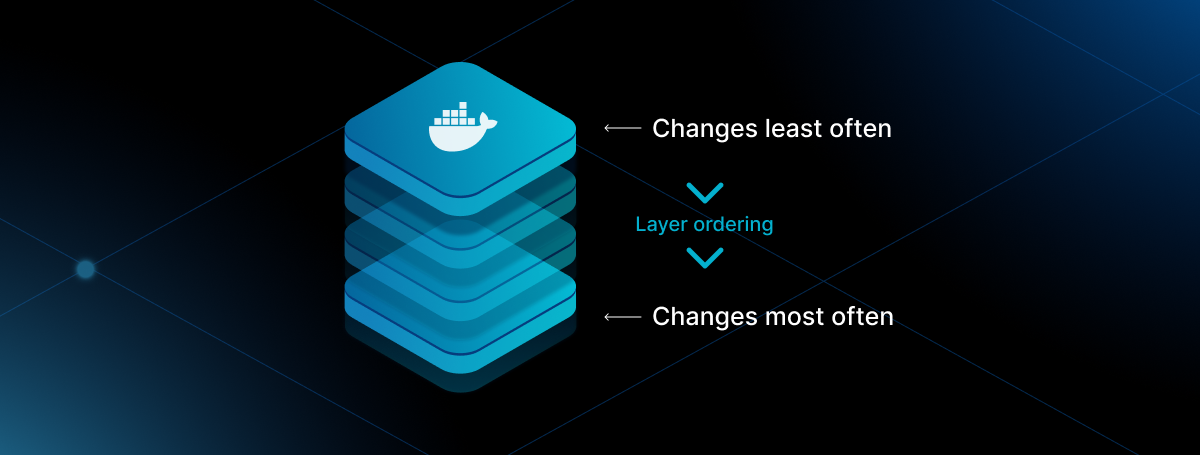
Order Instructions by Change Frequency
Principle: Instructions that rarely change → place first. Instructions that change often → place last.
❌ Not optimized:
| |
✅ Optimized:
| |
Result: When only source code changes, npm install is cached → saving 2–5 minutes per build.
Use .dockerignore
The .dockerignore file excludes unnecessary files from the build context, reducing the risk of unnecessary cache invalidation.
| |
Why is this important? Without .dockerignore, the COPY . . instruction copies node_modules (hundreds of MBs) and .git into the build context. Any change in these directories triggers a cache miss.
Use Cache Mounts
Cache mounts allow you to persist package manager caches across builds, even when a layer is rebuilt.
Node.js:
| |
Python:
| |
Go:
| |
Benefit: Even when package.json changes and the layer must rebuild, previously downloaded packages are still stored in the cache mount → only new packages are downloaded, not everything from scratch.
Multi-stage Build
Multi-stage builds separate the build process from the runtime, reducing the final image size and optimizing cache for each stage.
| |
| Stage | Purpose | Size | Included in final image? |
|---|---|---|---|
| builder | Build application | ~500 MB | ❌ No |
| production | Run application | ~30 MB | ✅ Yes |
Real-World Example: Optimizing a Node.js Dockerfile
Unoptimized Dockerfile
| |
Issues:
- ❌ Large base image (
node:18~ 900 MB) - ❌
COPY . .beforenpm install→ any code change rebuilds dependencies - ❌ No
.dockerignore→ copiesnode_modules,.git - ❌ No multi-stage → final image includes devDependencies
Optimized Dockerfile
| |
Improvements:
- ✅ Small base image (
node:18-alpine~ 170 MB) - ✅ Separate
COPY package.json→ efficient dependency caching - ✅ Cache mount for npm → faster re-downloads on rebuild
- ✅ Multi-stage → final image only contains production dependencies
- ✅ Uses
npm ciinstead ofnpm install→ ensures reproducible builds
Results Comparison
| Criteria | Unoptimized | Optimized |
|---|---|---|
| Image size | ~900 MB | ~170 MB |
| First build | ~5 minutes | ~5 minutes |
| Rebuild on code change | ~5 minutes | ~30 seconds |
| Rebuild on dependency change | ~5 minutes | ~2 minutes |
Useful Commands for Debugging Cache
| |
Reading build output: During builds, Docker shows CACHED for layers that use cache:
| |
Lines with CACHED mean the layer was retrieved from cache and didn’t need to be rebuilt.
Implementation Notes
- When applying to your project, keep these important points in mind:
- Always create a
.dockerignorefile before writing your Dockerfile - Separate
COPY package.jsonbeforeRUN npm install - Use multi-stage builds for production images
- Cache mounts (
--mount=type=cache) require BuildKit (enabled by default since Docker 23.0+)
- Always create a
- Best practices:
- Order instructions: rarely changes → first, frequently changes → last
- Use
npm ciinstead ofnpm installin CI/CD - Pin specific versions for base images (
node:18.12-alpineinstead ofnode:latest)
- Troubleshooting:
- Build is slow even though nothing changed? → Check
.dockerignore, unrelated files may be triggering cache misses - Cache mounts not working? → Make sure Docker BuildKit is enabled:
DOCKER_BUILDKIT=1 - Want to see which layer missed? → Use
docker build --progress=plain
- Build is slow even though nothing changed? → Check
🎯 Conclusion
To summarize:
- Layer = each instruction in a Dockerfile creates a layer in the image
- Build Cache = Docker stores layer results and reuses them when rebuilding
- Cache invalidation = when a layer changes, all subsequent layers must rebuild
- Optimization = proper instruction ordering +
.dockerignore+ cache mounts + multi-stage builds
By understanding and applying these 4 techniques, you can reduce Docker build times from 5 minutes to under 30 seconds in most cases. 🚀
If you find this article helpful, feel free to ⭐ star the repo or 📱 share it with your friends! 😊